CLEAN EATING REMAKE: Chicken with Thai Peanut Sauce

Untitled


Serves: 4
Hands-On Time: 20 minutes
Total Time: 45 minutes

INGREDIENTS:

  • 1/4 cup organic almond butter or peanut butter (found at Trader Joe’s)
  • 1/4 cup light coconut milk (found at Trader Joe’s)
  • 1 tbsp rice vinegar
  • 1 tbsp coconut balsamic vinegar (found at the Olympia Olive Oil store)
  • 2 tbsp chopped fresh cilantro leaves, plus additional for garnish
  • 1 tbsp raw honey
  • 1 tbsp fresh lime juice
  • ½ tbsp lemon grass stir-fry paste (found at World Market)
  • 1 tbsp minced fresh ginger
  • 1 tsp Braggs Branch Liquid Aminos Soy Sauce Alternative (found at The Vitamin Shoppe)
  • 1/2 tsp red pepper flakes
  • 1 clove garlic, minced
  • Olive oil cooking spray
  • 12 oz green beans, trimmed (or other combination of veggies of your choice)
  • 2 medium sweet potatoes, peeled and diced into 1/2-inch chunks (NOTE: Make sure to dice potatoes no larger than directed, as they should cook through in the same amount 
of time as the chicken.)
  • 1 red onion, sliced into 1/4-inch slices
  • 1 lb boneless, skinless chicken breasts, cut into 1-inch pieces

INSTRUCTIONS:

  1. Preheat grill to medium-high or preheat oven to 450ºF.
  2. In a medium bowl, whisk together almond butter, milk, vinegars, 2 tbsp cilantro, honey, lime juice, lemon grass paste, ginger, Braggs soy sauce, pepper flakes and garlic. Set aside.
  3. Cut 4 12 x 16-inch pieces of foil and mist with cooking spray. Divide green beans, potatoes and onion evenly into the center of each piece of foil. Divide chicken and peanut butter mixture between foil pieces, over top vegetables. Bring the short edges of the foil together, then fold inward a few times along each long edge to seal.
  4. Place foil packets directly on the grill or on a large, rimmed baking sheet in the oven. Grill or bake for 25 to 30 minutes, until chicken is cooked through and potatoes are tender. (NOTE: Carefully open a single packet to check, then reseal if needed.) Transfer contents of packets to serving bowls and garnish with additional cilantro.

Barbequed Spicy Honey Chicken

Spicy-Honey-Barbecued-Chicken


Ingredients:

3 Tbsp. raw honey

2 Tbsp. lemon juice

1 Tbsp. orange juice

2 scallions, finely chopped

1 tsp. finely chopped tarragon

1 tsp.  finely chopped thyme

1 tsp.  finely chopped sage

1 tsp.  fennel seeds, toasted and crushed

Freshly ground black pepper to taste

4 boneless, skinless, chicken breast halves (about 1 lb.)


Directions:

In a large bowl, combine honey, lemon and orange juices, herbs, scallions, pepper and

fennel seeds. Put the chicken in the bowl and marinate for 1-2 hours.

Grill the chicken, turning constantly while basting with the marinade until cooked.

Grilled Corn, Avocado, Tomato Salad with Honey Lime Dressing

Grilled corn, tomato, avocado salad


This recipe is quick and easy to make and is delicious.

Grilled Corn, Avocado and Tomato Salad with Honey Lime Dressing:

  • pint grape tomatoes cut in halves
  • 1 large ripe avocado, roughly chopped
  • 2 – 3 ears of fresh sweet corn
  • 2 tbsp fresh cilantro, chopped

Slice the tomatoes in half. Remove husks from corn and grill over medium heat for 10 minutes. The corn should have some brown spots and be tender and not mushy. Cut the corn off the cob then scrape the cob with the back of your knife to get the juices. Set aside and let cool. Dice the avocado and chop the cilantro.

Honey Lime Dressing:

  • Juice of 1 lime
  • 3 Tbsp olive oil
  • 1 tbsp raw honey
  • Sea salt and fresh cracked pepper, to taste
  • 1 clove garlic, minced
  • Dash of cayenne pepper

Add all the dressing ingredients in a small bowl and whisk to combine. Set aside.

Combine the sliced tomatoes, avocado, cilantro and grilled corn and honey lime dressing and mix gently so everything is evenly coated. Be careful not to mash the avocados. Let the salad sit for 10-15 minutes to let flavors mingle. Enjoy.


Dairy-Free Coleslaw

paleo coleslaw


Prep time: 10 mins     

Chill time: 1 hour


Ingredients:

– 2 – 16oz. bags of pre-made coleslaw

(or make your own by using 1 large head of cabbage (1/2 regular & ½  purple), 3-4 medium carrots and 1 bell pepper, finely shredded/diced)


DRESSING:

– 1/2 cup raw honey

– 1/2 cup apple cider vinegar

– 1/3 cup lite olive oil

– 1/2 tsp. sea salt

– 1/2 tsp. dry mustard

– 1/2 tsp. celery seed

– 1/2 tsp. garlic powder

– 1/2 tsp. ground black pepper


Directions:

1. Place a medium saucepan over medium heat and add dressing ingredients to the pan. Stir to combine and bring to a boil.

2. Simmer for 3 – 4 minutes, stirring occasionally.

3. Pour the dressing over the coleslaw mix and toss to coat. Cover and place in the refrigerator for at least one hour or until chilled. Taste and adjust any seasonings as needed.

No Hassle Summer Mexican Layer Salad

 no hassle mexican layered salad

Ingredients

2 Ziploc Microwave Steamer bags (Not required, but saves time! You can find these in the food storage area at: Fred Meyer, Top Foods, Walmart, and Safeway)

¼ c. fresh salsa
1 large head of cauliflower, mashed with 6 cloves garlic
4 medium size sweet potato, hashed or diced into small pieces
3 – 4 roma tomatoes, diced
3 avocado, diced
1/2 head romaine lettuce, diced
1 14oz can sliced black olives
2 lbs 85% grass fed ground beef or use lean ground chicken or turkey
1 Tbsp chili powder
1/4 tsp garlic powder
1/4 tsp cayenne pepper
1/4 tsp oregano
1/2 tsp smoked paprika
1/2 Tbsp cumin
1 tsp salt
1 tsp pepper
1/4 tsp chipotle chili powder

1-2 Tbsp cotija Mexican cheese (found more commonly at a Mexican store. Feel free to omit if you are trying to be dairy free!)


Method

1. Chop cauliflower into pieces using the entire head. Place inside a Ziploc steamer microwave bag along with the garlic cloves and microwave until very soft (about 6-8 minutes/see bag for cooking times).

2. Meanwhile, season meat in a non-stick skillet with all of the spices (chili powder, garlic powder, cayenne pepper, oregano, smoked paprika, cumin, chipotle chili powder, salt, and pepper) until lightly browned or cooked through. Note: If using lean ground chicken or turkey as it is very low in fat, in order to maintain some moisture while cooking drop a little coconut oil in the skillet before dropping the meat in.

3. While the meat rests, mash up the garlic and cauliflower together (add a dash of sea salt). For the quick and easy way to do this, just throw it all in a food processor/blender for a couple cycles around (maybe 5 seconds) and it will be ready.

4. Sauté hashed sweet potato in fat/seasonings left over from sautéing the ground beef or chicken or turkey. For the quick and easy way to do this, just throw the sweet potatoes into a Ziploc steamer microwave bag and microwave until soft (about 5-7 minutes/see bag for cooking times).

5. Have the salsa, olives, and cheese ready and prep the tomatoes, lettuce, and avocado by dicing them into pieces.

6. Layer your salad in your own deep dish salad bowl! This recipe makes about 4 – 6 big and very filling servings. Start with 4oz. of the meat for a full protein serving and layer the rest as follows:  cauliflower/garlic mash, sweet potatoes, salsa, lettuce, black olives, tomatoes, avocado, and cotija Mexican cheese. Enjoy!


Affordable Organics

When it comes to purchasing produce, I generally suggest that my clients to stay organic in order to make sure they are consuming pesticide free products. At the same time, organic produce tends to be more costly. When availability of organic produce is out of your reach or you don’t have enough funds to buy all organic, below is a list of non-organic foods that have been shown to be safe to eat (meaning contain low-levels of pesticide residue, etc).
1. Asparagus
2. Avocado
3. Eggplant
4. Onions
5. Cabbage
6. Mango
7. Pineapples
8. Sweet Peas
9. Kiwi
10. Grapefruit
11. Sweet Potatoes/Yams
12. Watermelon

The “Do It Anywhere” Workout

For a longer workout complete all four circuits together. For a shorter workout, pair two circuits together and complete them. Then, on a different day complete the other two circuits together!

WARM-UP:

Jog In Place 1 Minute

100 Jumping Jacks


Circuit 1

50 Air Squats

40 Push-ups

30 Second Plank

20 Chair Dips

10 Curtsy Squats (each side)


Circuit 2

50 Burpees

40 Alt. Reverse Lunges w/Ab Twist

30 Plank Twists

20 Jogging High Knees In Place (each side)

10 Inchworms


Circuit 3

50 Jump Squats

40 Tricep Push-Ups

30 Bicycle Crunches (each side)

20 Low Back Supermans

10 Donkey Kicks (each side) – In Plank Position


Circuit 4

50 Alternating Lunge Switch Jumps

40 Plie Squats w/Heel Raise

30 Squat Thrusts

20 1-Legged Straight-Leg Deadlifts

10 Resistance Band Side Steps


 COOL DOWN:

March in Place 1 Minute

Stretch

Local Fitness and Nutrition Expert Shares Secrets to Staying Fit and Healthy on the Road

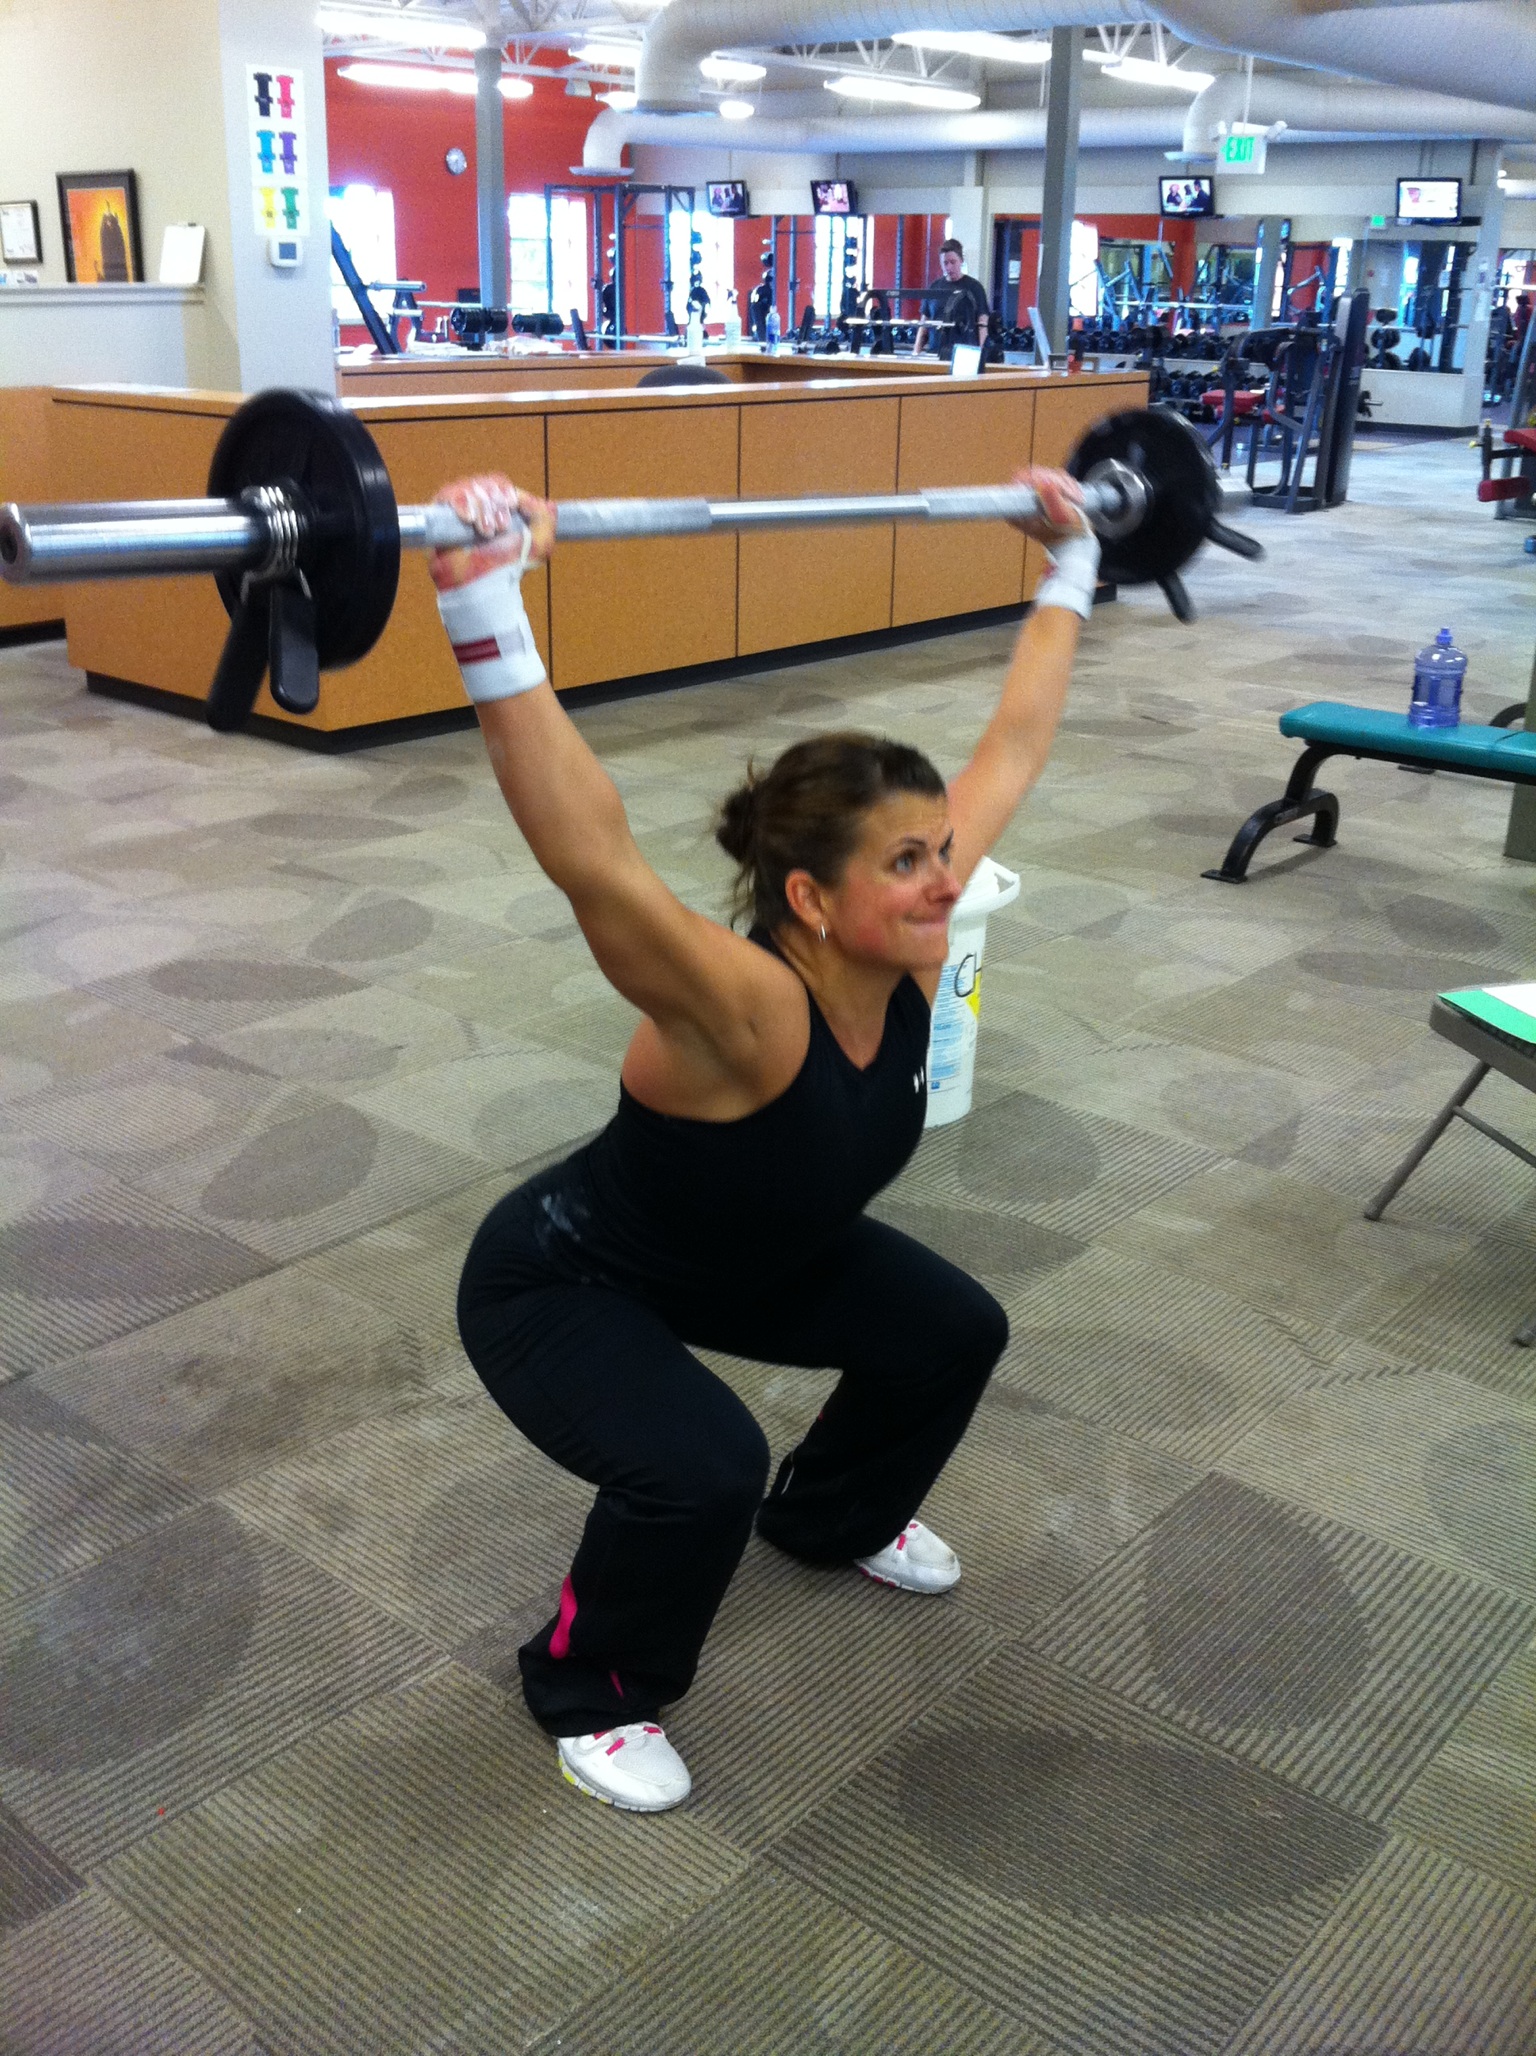
Amanda Salazar, owner of Edge Fitness and local health and fitness expert, recognizes that this is a popular time of year for her clients to begin traveling more frequently for work and for personal vacations and enjoyment. Amanda says, “For most people, it tends to be a very challenging task to maintain a fitness program when traveling frequently, but it is possible.  It just takes a little preparation, dedication, and mindfulness to make it happen!” Here are some of her on-the-road fitness and nutrition secrets:


1. Do a little research. If you are staying at any hotels during your travel, call ahead and find out if they have a fitness room. Find out what type of fitness tools or workout machines are provided. What hours is the room available for use daily?


2. Don’t feel guilty for opting out. Try not to over cram your entire day. Build a little bit of downtime into your schedule. Your stress levels will stay lower and you’ll return home feeling refreshed instead of needing a long vacation.


3. Bring easy-to-pack affordable fitness tools. A jump rope, resistance bands, and pedometer are light-weight items that are easy to pack and can be used anywhere no matter how much space you have available. Not sure what to do with these fitness items? A personal trainer like me can easily put together an “on-the-road” fitness program for you in just one or two private sessions.


4. Maintain muscle tone by doing exercises that require your own body weight or resistance bands. Squats, lunges, hip bridges, push-ups, chair dips, planks, and abdominal crunches can be done with your own body weight. With a band, shoulder exercises like upright rows, overhead presses, and lateral raises can be done; chest presses for your chest and seated rows for your back. With these exercises, a total-body workout can be done!


5. Better at following instructions instead of putting together a routine on your own? Pick up a few at-home cardio, strength training, and/or yoga workout DVD’s and use them in your hotel room.


6. Keep cravings low. Instead of high sugar soda or juice, order a low or no-calorie beverage with your meal. This will help fill you up with fewer additional calories.


7. Consume alcohol wisely. Alcoholic beverages are considered a carbohydrate. If you drink one, substitute the carbohydrate in your meal with low-glycemic veggies such as broccoli, bell peppers, green beans, zucchini, or cauliflower.


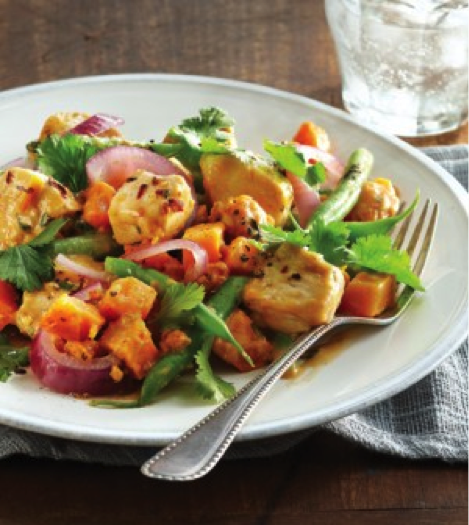
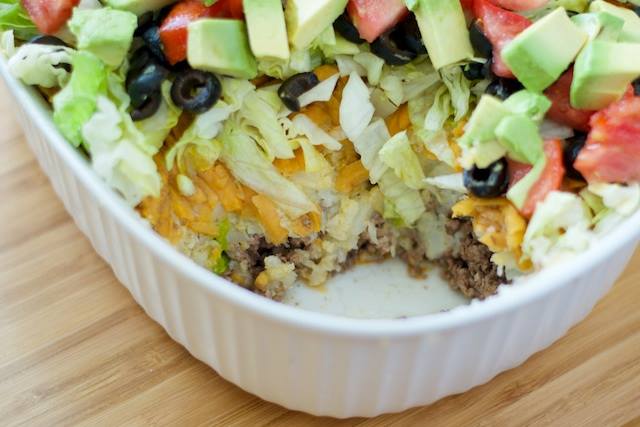
8. Keep it simple. Order simple foods from the menu like baked, grilled, boiled, roasted, poached, and steam entrees. Chose sauces that are light or ask for no sauce. Avoid additional extras or keep them on the side so you can control how much you use.


9. Sharing is caring. In the spirit of better health choices, when eating out share a meal with someone you are traveling with. You will take in half the calories. With such oversized portions served these days anyway, chances are you will be full or content with consuming just your half of the meal. Another great idea is to request a takeout box to be delivered to your table at the same time your meal is delivered. Before you take a bite, put half of everything in your takeout box and put it off to the side. You’ll take more time to enjoy the food that is in front of you, you’ll save on the extra calories, and you will save money. You can eat the leftovers for another meal or two later so you don’t have to eat out again! Also, be sure to remove any visible fat from your meal when you eat out as there are a lot of hidden fats in restaurant foods. Cut away visible fat from steak, remove skin from chicken, dip your fork in salad dressings instead of having them poured over your food, scrape extra butter/cheese off the top of other food items.)


10. Portion distortion. With so much social media it is hard to know what a ‘healthy portion’ is. It can all be so overwhelming and more than likely you won’t be traveling with measuring cups and a scale to check your portions. So, follow my portion suggestions as a guide: Half of your fist is a carbohydrate portion. The palm of your hand is a lean protein portion. Your thumb is a portion of fat or cheese. Fill up with raw or steamed veggies because good for you and they don’t need to be measured.


Keep my “on-the-road” fitness and nutrition secrets handy. Trust me, it feels great to be able to travel and enjoy the local food and environment without gaining weight that you dread having to work off when you get back into your hometown!


If you are not sure where to start and need a “one-the-road” health and fitness program customized for you, contact Amanda Salazar, owner of Edge Fitness at: [email protected] or call (360) 790-6767. She can design an affordable full-proof program for you!

I AM NOT BULLET PROOF

200 lbs. Motorcycle Accident Lifting Photo color head shot


I AM NOT BULLET PROOF.

Recently, a new client came to me struggling in several areas health-wise both physically and emotionally. She explained that it was very difficult for her to feel comfortable enough to even reach out and schedule a meeting to possibly get help from me. In fact, she said it took her nine months before deciding to make the phone call.

In our first meeting, after hearing some of her story I told her that I could relate as I had a similar story and really did understand how she was feeling and where she was coming from. She looked at me with a confused face and then said, “It’s hard for me to truly believe you when you say that. You look like have looked the way you do all of your life and you seem so confident and almost bullet proof.”

Reality hit me. Sometimes, I really do forget that people see me quite differently than I see myself. I am in a much healthier body, but my mind forgets this sometimes.

I started by telling her that of all the things that I am now, the one thing know I am not……is that I AM NOT BULLET PROOF.

Most personal trainers have overcome some sort of health struggle which later brings them to be in their profession today because they want to help and show others that they can do it too. They truly care about their clients and have a passion for what they do.

Before deciding to become a health and fitness professional, I had overcome obesity, anorexia, bulimia, depression, low self-esteem, exercise addiction, cancer and recovered from a near death life-changing motorcycle accident and more.

When I tell my clients to stop making excuses, never say never, get dialed in and to take control of their lives over and over and over…..it is because I did the exact opposite for so many years of my life and it almost killed me. One day, a personal trainer who cared about me, took me under his wing and saved my life! I’ll never forget him.

Below is a picture of ME. It is one of the last pictures I allowed to be taken of myself before I went past the 200 pound mark. I was full of excuses, held personal pity parties daily, was always feeling bad for myself, and had the worst self-esteem and self-confidence ever. Who was I kidding!??? Every day, I had the ability to make a conscious correct choice, but used excuse after excuse to make the wrong choices. It exhausted me to the point in my life where I was ready to give up on life itself. But, luckily one day…… a personal trainer decided to help me and began to bring me back to reality. Some say it is expensive, but how can you put a price on life, happiness, and success. My trainer was the best investment I have ever made.

After years of hard work and reaching my health and fitness goals,  I decided that I wanted to do the same and helping others achieve and live healthier lifestyles was the only thing that I knew was going to make me happy for the rest of my life! So, this is how I came to be a health and fitness expert and I wouldn’t trade the world for it.

If you don’t have a personal trainer, nutritionist, or health and fitness coach, I am here to help you take the first step no matter what that step is. Just remember, there is never a perfect time to start and if you wait for that perfect time to happen, it will probably never come. You just have to take the plunge and know that an amazing and positive life change will be ahead of you along with a supportive coach!

If you already have a personal trainer, take advantage of all the information they give you, make 100% effort using the tools they give you every chance you get, and don’t forget…….they aren’t bullet proof. They are human and struggle too. Also, thank them for doing what they do. On a daily basis, trainers take in a lot of excuses, whining, complaining, bad language, grunting, venting and more from their clients. Every now and again it is just nice to hear the words…….”Thank you.”


Killer Abs Please!

Complete 2-4 rounds of this workout 2-3 times per week on non-consecutive days.

20 Upper Ab Crunches (Legs Raised)

20 Reverse Crunches

20 Bicycle Twists Crunches

10 Sit-Ups

10 V-Sits

1 Minute Plank Hold

The “Quickie” Workout

I have several clients who are in amazing shape just by doing quick at-home workouts that don’t require any equipment……just themselves, their body weight, and a floor.  These  types of workouts can be done anywhere whethere it be at an office, in a hotel room while on vacation or on business travel, or outside at a local park. Remember the worst workout……..is the one that doesn’t happen. No excuses….get it done!

Repeat the below circuit 2-3 times.

30 Jumping Jacks (low impact or for high impact do star jumps)

10 Push Ups (on knees or toes)

15 Burpees (flat belly – lie all the way flat to the ground at bottom)

20 Alternating Leg – Side Lunges

25 Sets Knee Highs (run fast high knees or for low impact march fast with high knees)

1 Minute Wall Sit

30 Bicycle Twists Crunches

20 Jump Squats (or for low impact raise up into calf raise lower down into a low squat)

10 Tricep Push-Ups (on knees or toes)

30 C-crunches (low impact) or  V-Crunches (high impact)

Is There Such Thing As Working Out Too Much?

QUESTION:

IS THERE SUCH THING AS WORKING OUT TOO MUCH?

Yes, there is such a thing! A client recently told me they were starting to workout 3 times a day to get more results quicker. They thought they were losing body fat since their weight on the scale was going down, but that’s not the case. I have taken their measurements weekly…their body fat has been unchanged and increasing and they have lost lean muscle mass. Yikes! This is NOT A GOOD thing!

PROBLEM:

They have been following a muscle magazine pro diet and exercise program.

 Professionals get paid to look the way they look and not mess up…..they are 100% all of the time, work hard all of the time, and have nutrition and workout programs tailored to what they have to achieve! This is not always realistic for the normal day to day person that wants to get into shape!

 ANSWER:

If your workout program and diet has not been programmed for you specifically by a certified trainer/nutritionist based on your body, your goal, and your daily activity level, instead of getting better results your results may start to be erratic or suffer and begin to dwindle. Along the way, the 3-a-day workouts can or will make your body more fatigued from over training and with lack of proper nutrition can also lead to increased injury and slower recovery rates.

SOLUTION:

Simply put ….if your diet is designed correctly and you stay within it weekly in combination with a well rounded and balanced customized workout program, you can often times workout less, be more efficient and get continued positive results!

 HOW TO ACT NOW:

This is what we specialize in here at Edge Fitness! Stop wasting time on your own or trying every magazine diet/workout program in the books! Get a program designed my real-life certified professional that is customized for you today! Message us with your information and we will contact you the same day to get you setup and started!

The 20-Minute Power Lunch Workout

Need a time efficient, fat burning, full-body workout that can be done at home or at a gym in only 20 minutes?

Try this one out!

20-Minute AMRAP

(Do As Many Rounds As Possible of the Below Exercise Set in 20 min.)

400 Meter Run (1/4 of a mile)
20 Around the World Push-Ups
20 Weighted Surrender Lunges (Don’t have weights at home? Use a couple of cans of food!)
20 Pancake Sit-Ups

Jailhouse Ten Workout

Hey everyone!
This is a great cardio workout that can be done ANYWHERE!
Depending on your fitness level it will be a 15 – 35 minute high intensity cardio workout time-wise!
If you can’t run outside you can always run on the treadmill. If you can’t run….you can speed walk, jog in place, do high or low-impact jumping jacks or anything to get your heart rate up! Give it a try!!
Complete AFAP (As fast as possible!)

Jailhouse Ten – Complete AFAP (As Fast As Possible)
Do 10 burpees – Run 1 Minute
Do 9 burpees – Run 1 Minute
Do 8 burpees – Run 1 Minute
Do 7 burpees – Run 1 Minute
Do 6 burpees – Run 1 Minute
Do 5 burpees – Run 1 Minute
Do 4 burpees – Run 1 Minute
Do 3 burpees – Run 1 Minute
Do 2 burpees – Run 1 Minute
Do 1 burpees – Run 1 Minute
DONE!


Peanut Butter Protein Cookies

1 cup Organic unsalted peanut butter or almond butter

1 Large egg

1 Egg white

2 tbs. Applesauce

1/4 cup Vanilla protein powder

1 cup organic Old fashioned oats (use gluten free if sensitive)

1/2 cup Baking stevia OR 1 cup sweetener of choice that measures like sugar

1/8 tsp. Sea salt

1 tsp. Baking soda

Optional:

2 tbs. organic mini dark chocolate chips

Baking Instructions:

The estimated time to make this recipe is 15-20 minutes.

1. Preheat oven to 350 degrees. Line sheet pan with foil, and spray with non-stick spray, (or line with parchment paper).

2. Microwave peanut butter in for 30 seconds, or until softened, which will make it easier to mix. In a medium bowl, mix together the first four ingredients until smooth. In a separate bowl, mix together the rest of the dry ingredients. Combine the wet and dry ingredients together. (Add chocolate chips if desired).

3. Moisten hands (to prevent from sticking), and roll cookie dough into balls. Use a fork to press a criss-cross into each cookie. Bake 8-10 minutes. Let cookies cool, and enjoy!

Additional Baking Notes:

1. For a ‘smooth’ batter, use 1 cup oat flour instead of using oats in original form. Make your own oat flour by grinding the oats in a blender or food processor until fine.

2. I used NuNaturals More Fiber Stevia Baking Blend. If using packets of stevia, I recommend using about 8-12, or adjust according to taste.

Nutritional Breakdown:

24 Cookies (or 12 large cookies)

85 Calories per Cookie

6 g Fat per Cookie

7 g Carbohydrate per Cookie

1.5 g Fiber per Cookie

0.2 g Sugar per Cookie

7 g Protein per Cookie

Banana Chocolate Pops

1 (12 oz.) package firm silken light tofu, drained

1 ½ C. organic semi-sweet or dark chocolate chips

1 teaspoon vanilla extract

1/8 teaspoon sea salt

10 bananas

20 lollipop or popsicle sticks (found at local craft store)

½ C. chopped nuts, optional

1. Add tofu to a food processor; process until smooth

2. Place chocolate in top of a double broiler. Cook over simmering water until melted. (Or melt chocolate in microwave.) Add to tofu in food processor. Add vanilla and salt; process until smooth. Pour into a 2-cup measuring cup or small deep bowl.

3. Peel bananas and cut in half crosswise. Place lollipop sticks into one end of each banana half. Dip bananas in chocolate mixture, twirling to coat. Place on wax paper; sprinkle with nuts if desired.

4. Freeze until chocolate is hard, about 1 hour. Makes 20 pops.

Nutrition Per Serving:

150 calories

6g fat

0mg cholesterol

4g protein

24 g carbohydrates

3g fiber

15 mg sodium

Paleo Style Crispy Oven-Baked Sweet Potato Fries

Prep time:  10 minutes

Cook time:  30 minutes

Total time:  40 minutes

Serves: 4

Ingredients:

-4 small-medium sweet potatoes (we prefer garnet), 6-8″, 2-3″ in diameter

-3 tablespoons olive oil or melted coconut oil (this amount is not an exact science..enough to make sure all your sweet potatoes are coated and glossy but not drowning!!

-Sea salt to taste

-Optional seasonings


Instructions:

1.Preheat oven to 450 degrees and lightly grease 2 cookies sheets or line with parchment.

2.Peel sweet potatoes, but do not rinse them……you need them dry so the oil adheres.

3.Slice your sweet potatoes into french fries – Keep the pieces equal in size and thickness. Fries should be between ½” and ¾”.

4.In a large bowl, toss the fries with the olive oil (or raw coconut oil – just melt in micro first then toss with fries). Also, toss fries with seasonings if you prefer. Some ideas are minced garlic, paprika, cayenne, Cajun seasoning, chipotle powder, chili powder, Italian seasoning. (I wait to sprinkle sea salt on them when the potatoes are on the cookie sheet.)

5.Spread the fries out in a SINGLE LAYER on a cookie sheet. Do not crowd your fries!

6.Sprinkle the fries with sea salt.

7.Place no more than two cookie sheets in the preheated oven and bake for 15 minutes.

8.Remove cookie sheets and using tongs, flip the fries over, they should be golden on the flipped side. Return the cookie sheets, flip flopping the cookie sheet positions.

9.Cook for another 10-15 minutes until the fries are golden and crispy.

Protein Pancakes

Ingredients:
1 cup fat-free cottage cheese
6 egg whites
½ cup whole wheat flour (or 1/4 cup whole wheat and 1/4 cup barley flour)
¼ cup vegetable oil
Pinch of salt
Dash of vanilla extract
Dash of cinnamon to taste (per preference)
1/2 cup -1cup of fresh blueberries
¼ cup milk (you can also use unsweetened or regular almond milk)

Blend or food process first seven ingredients on high until smooth. Add milk slowly to reach batter consistency, and then fold in blueberries last. Cook on a hot, nonstick griddle. The number of pancakes vary by size. Serves 6.
Top with an all-natural sugar free syrup.

Chicken Protein Pizza

Ingredients For the crust:
1 chicken breast precooked (season as desired)
3 eggs
Italian herb seasoning, garlic powder, pinch of sea salt and pepper

Using a food processor, blend ingredients together until completely smooth. Mixture will
look like thick pancake batter.

Use the mixture and cook in hot greased skillet like a pancake. Batter may need to
be spread out a bit so that it is not too thick.

These cook very fast. Watch them closely. This will become your “crust.”

Spread the top of the crust with a nice
tomato sauce or low-sodium marinara and veggies sautéed in olive oil.

Sprinkle a little feta or mozzarella cheese on top.

Transfer crust onto cookie sheet. Broil in oven for just a few minutes until cheese has melted.

Garden Fresh Turkey Burger

Many of you find it difficult to get a healthy amount of lean protein, complex carbs, and vegetables into your diet. Well, my ‘Garden Fresh Turkey Burger’ does the trick and the burger itself only has 235 calories!

Ingredients:
1.25 lb. lean ground turkey
1 c. Quaker Oats uncooked (quick or old fashioned)
1 c. finely chopped onion (white, yellow, or purple – your choice!)
1 c. finely chopped red or green bell pepper
¾ c. shredded zucchini (about 1 small)
¼ c. Organic Ketchup (Also try Sugar Free or Low-Sodium Ketchup)
2 cloves garlic, crushed
¼ c. Egg whites (to bind it all together)
Add some seasoning salt/herbs of your choice

Combine ingredients; mix well (use your hands to mush it all together). Shape into 6 large burgers.

Outdoor – Cook on the grill! Grill over medium heat on outdoor grill…just a few minutes on each side.

Indoor – Spray cookie sheet or pan with non-stick cooking spray.
Broil on center rack in oven for 8 – 12 minutes on each side or until golden brown.
Serve alone with a little feta cheese on top or on Sandwich Thins and garnish with lettuce and slice tomato if desired.

Healthy and Easy Curry Coconut Chicken Tenders

Ingredients:
1 lbs. organic chicken tenders (or chicken breasts and cut into strips)
1 C. organic unsweetened or light coconut milk
½ – 1C. organic unsweetened shredded coconut
Seasonings/Herbs: garlic powder, onion powder, curry powder, cilantro
½ C. organic egg whites
Lime wedges

Instructions:

Marinate chicken in coconut milk for 2 hours.

Mix seasonings/herbs together and put in bowl or on plate.

Dip chicken tenders/pieces into egg whites.

Roll into coconut/seasonings mixture.

Coat pan with organic raw coconut oil.

Lay chicken tenders/pieces on pan.

Bake in oven at 350 degrees for 40 minutes or until chicken is one and coconut is golden brown.

Squeeze lime juice over the top of the chicken when done. Serve chicken over brown rice or quinoa and steamed veggies.

Lemon, Rosemary, and Balsamic Grilled Chicken

Ingredients:
¾ Balsamic Vinegar
½ C. Olive Oil
¼ C. Rosemary
3 TBSP. Thinly slice garlic (or minced garlic)
2 TBSP. Lemon zest (I add the lemon juice from the lemons too)
4-8 Chicken breasts (depends on size or use chicken tenders)
Sea Salt and freshly ground pepper

“In a medium bowl, combine the balsamic vinegar, olive oil, rosemary, garlic, lemon zest and red pepper flakes. Whisk to combine and pour into a 1-gallon re-sealable food storage plastic bag. Put the chicken in the bag and seal it. [I threw the lemons in the bag as well.] Turn to ensure that the chicken is evenly coated, then refrigerate, turning occasionally, for 2 to 4 hours.”

“Season the chicken well on all sides with a little sea salt and pepper, then place on the grill. I line to grill with foil. It’s just easier. The balsamic will caramelize and is very sticky. Just spray the foil with oil. Cook the chicken about 8 to 11 minutes, turn and continue to cook an additional 8 to 11 minutes, or until the chicken is cooked through. Remove from the heat and serve while hot. No grill? Bake on cookie sheet lined with foil sprayed with non-stick at 350 degrees for 9-10 minutes per side.

Primal (Paleo) Energy Bar

Ingredients:
1/2 cup slivered almonds
1/2 cup pecans
1/4 cup unsweetened shredded coconut
1/4 cup almond butter (although cashew, hazelnut, walnut and even pumpkin butters will work well too!)
1/4 cup coconut oil (check your local health food store)
1/4 cup almond meal (simply pulse approximately 1/4 cup of almonds until it creates a coarse flour)
1 1/2 tsp pure vanilla extract
1/2 tsp of raw honey (although, this is really kind of optional because the egg will help hold the mixture together)
1/2 cup unsweetened whey protein powder or egg protein powder (or 60g)
1 large egg
1/2 teaspoon sea salt
1/2 cup dried cranberries or blueberries
1/4 cup unsweetened coconut to sprinkle on top

Method:

  1. On a cookie sheet, toast nuts and shredded coconut until golden brown. In order for them to cook evenly, you need to shake up the tray at least once during cooking…trust us!
  2. Once toasted, pour mixture into a food processor and pulse until nuts are chopped and the mixture becomes coarsely ground (sort of the consistency of bread crumbs).
  3. In a mixing bowl, melt coconut oil and almond butter (about 30 seconds). Remove from microwave and stir until smooth.
  4. Add vanilla extract, honey and sea salt. Mix thoroughly.
  5. Fold in nut mixture, almond meal and protein powder until mixed thoroughly.
  6. Add whole egg and mix thoroughly.
  7. Fold in blueberries/cranberries.
  8. Press mixture into an 8 by 8 loaf pan (a modification that we made to keep everything crisper and help the bars to hold together).
  9. Cook in a preheated oven at 325 degrees for 10 minutes.
  10. Remove from oven, sprinkle a ¼ cup of shredded coconut on top and place under broiler until top begins to brown.
  11. Let cool for 10-15 minutes. Cut into 12 pieces/bars.
  12. Enjoy or stack on wax paper/parchment and store in an airtight container.

Note: You can also add organic dark chocolate chips instead of the cranberries/blueberries (available at Whole Foods or health food store). If you add the chips while the mixing bowl is warm (from the coconut oil/almond butter mixture), they will melt into the mixture and you will have yourself a chocolate primal bar. Alternatively, you can just let the mix cool, then add the chips, then refrigerate the pan to get chocolate chip primal bars. The bars stick together pretty well without being cooked.

Nutrition Information:
Nutrition for 1/12 of the batch. Nutritional breakdown courtesy of FitDay.com:
Calories: 184
Fat: 15.4 grams
Carbohydrates: 6.4 grams
Protein: 7.5 grams
And, for those of you who feared they would eat the whole pan… the total nutritional breakdown for the whole darn lot!
Calories: 2,206
Fat: 184.3 grams
Carbohydrates: 77.2 grams
Protein: 90.1 grams

Spaghetti Squash (The Fast Version)

Using a sharp knife, cut the squash in half lengthwise and place cut side down, in square or rectangular microwave dish.

Add ¼ – ½ inches water into dish.

Microwave for 7-9 minutes or until soft.

If squash is done, you should be able to run a fork down through squash making spaghetti-like strands easily.

Season and flavor:

-You can use olive oil, garlic, and herbs or use marinara and add other veggies and lean ground beef or turkey to make it a meal!

Chocolate Peanut Butter Protein Bars

Ingredients:
1/3 c Dried cranberries
¼ c raw slivered unsalted almonds
1/2 tbsp. Cinnamon
2 c. organic oatmeal
1 cup egg protein powder (low-carb whey protein is your next best option)

1/4 c non-pasteurized honey
1/4 c unsweetened almond milk
1/4 c 70% – 75% dark chocolate
1/4 unsweetened applesauce
/4 – 1/3 c organic unsalted peanut butter
1 tsp. vanilla extract (no alcohol extract if you prefer)

Mix dry ingredients and set aside.

In separate bowl combine wet ingredients and then microwave for 30 seconds bouts until mixture is melted and liquid-like. Then, toss dry ingredients with wet.

Line a 9×9 pan with wax paper and lightly coat wax paper with Pam non-stick spray. Refrigerate for 20 – 30 minutes. Then take wax paper with bars on it out of pan, place on cutting board, cut into approx. 8 bars. Individually store them in the fridge for a quick grab and go snack before or after a workout!